When acquiring images through a stereo microsocpe one of the most common problems to overcome is inconsistant lighting. Whether looking at a printed circuit or looking at a natural specimen such as a fly most of these samples have the potential to reflect light. Add to this the inconsistancy of reflection (think the fly eye vs. body, or the chip coating vs. connecting pins) and what we get is a dynamic range problem.
One way to overcome this is by using a cheap and simple copy of a softbox. Normal softboxes for photography are commonly used for macro shoots. We have two problems with a softbox for microsocpy: First, the bottom and top of our softbox must be removed, as we need to place the sample down, then place the softbox on top, then acquire images looking from above. Second, we need a softbox that can dynamically change it's size depending on our magnification, working distance and specimen size.
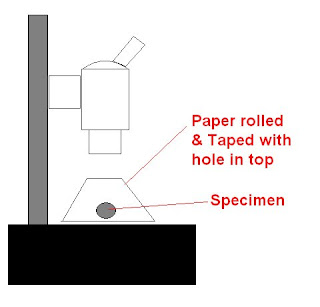
Both of these problems can be overcome using either a piece of standard printing paper, or for better results a sheet of diffusing paper such as the type used for overhead projectors. In either case simply cut the paper to size, and form a cone with an open top.
Tape the cone together and place it over the specimen. Assuming you are using bifurcated light pipes simply position the lights on either side of the cone and far enough back for even light distribution. What you'll get is a uniform, diffuse light that drops glare and reduces the dynamic range!
Here's an example image using a softbox from a sheet of printer paper.
Enjoy!
Saturday, February 21, 2009
Lighting Control for Stereo Microscopy
Subscribe to:
Post Comments (Atom)

No comments:
Post a Comment